Please select the platform to login


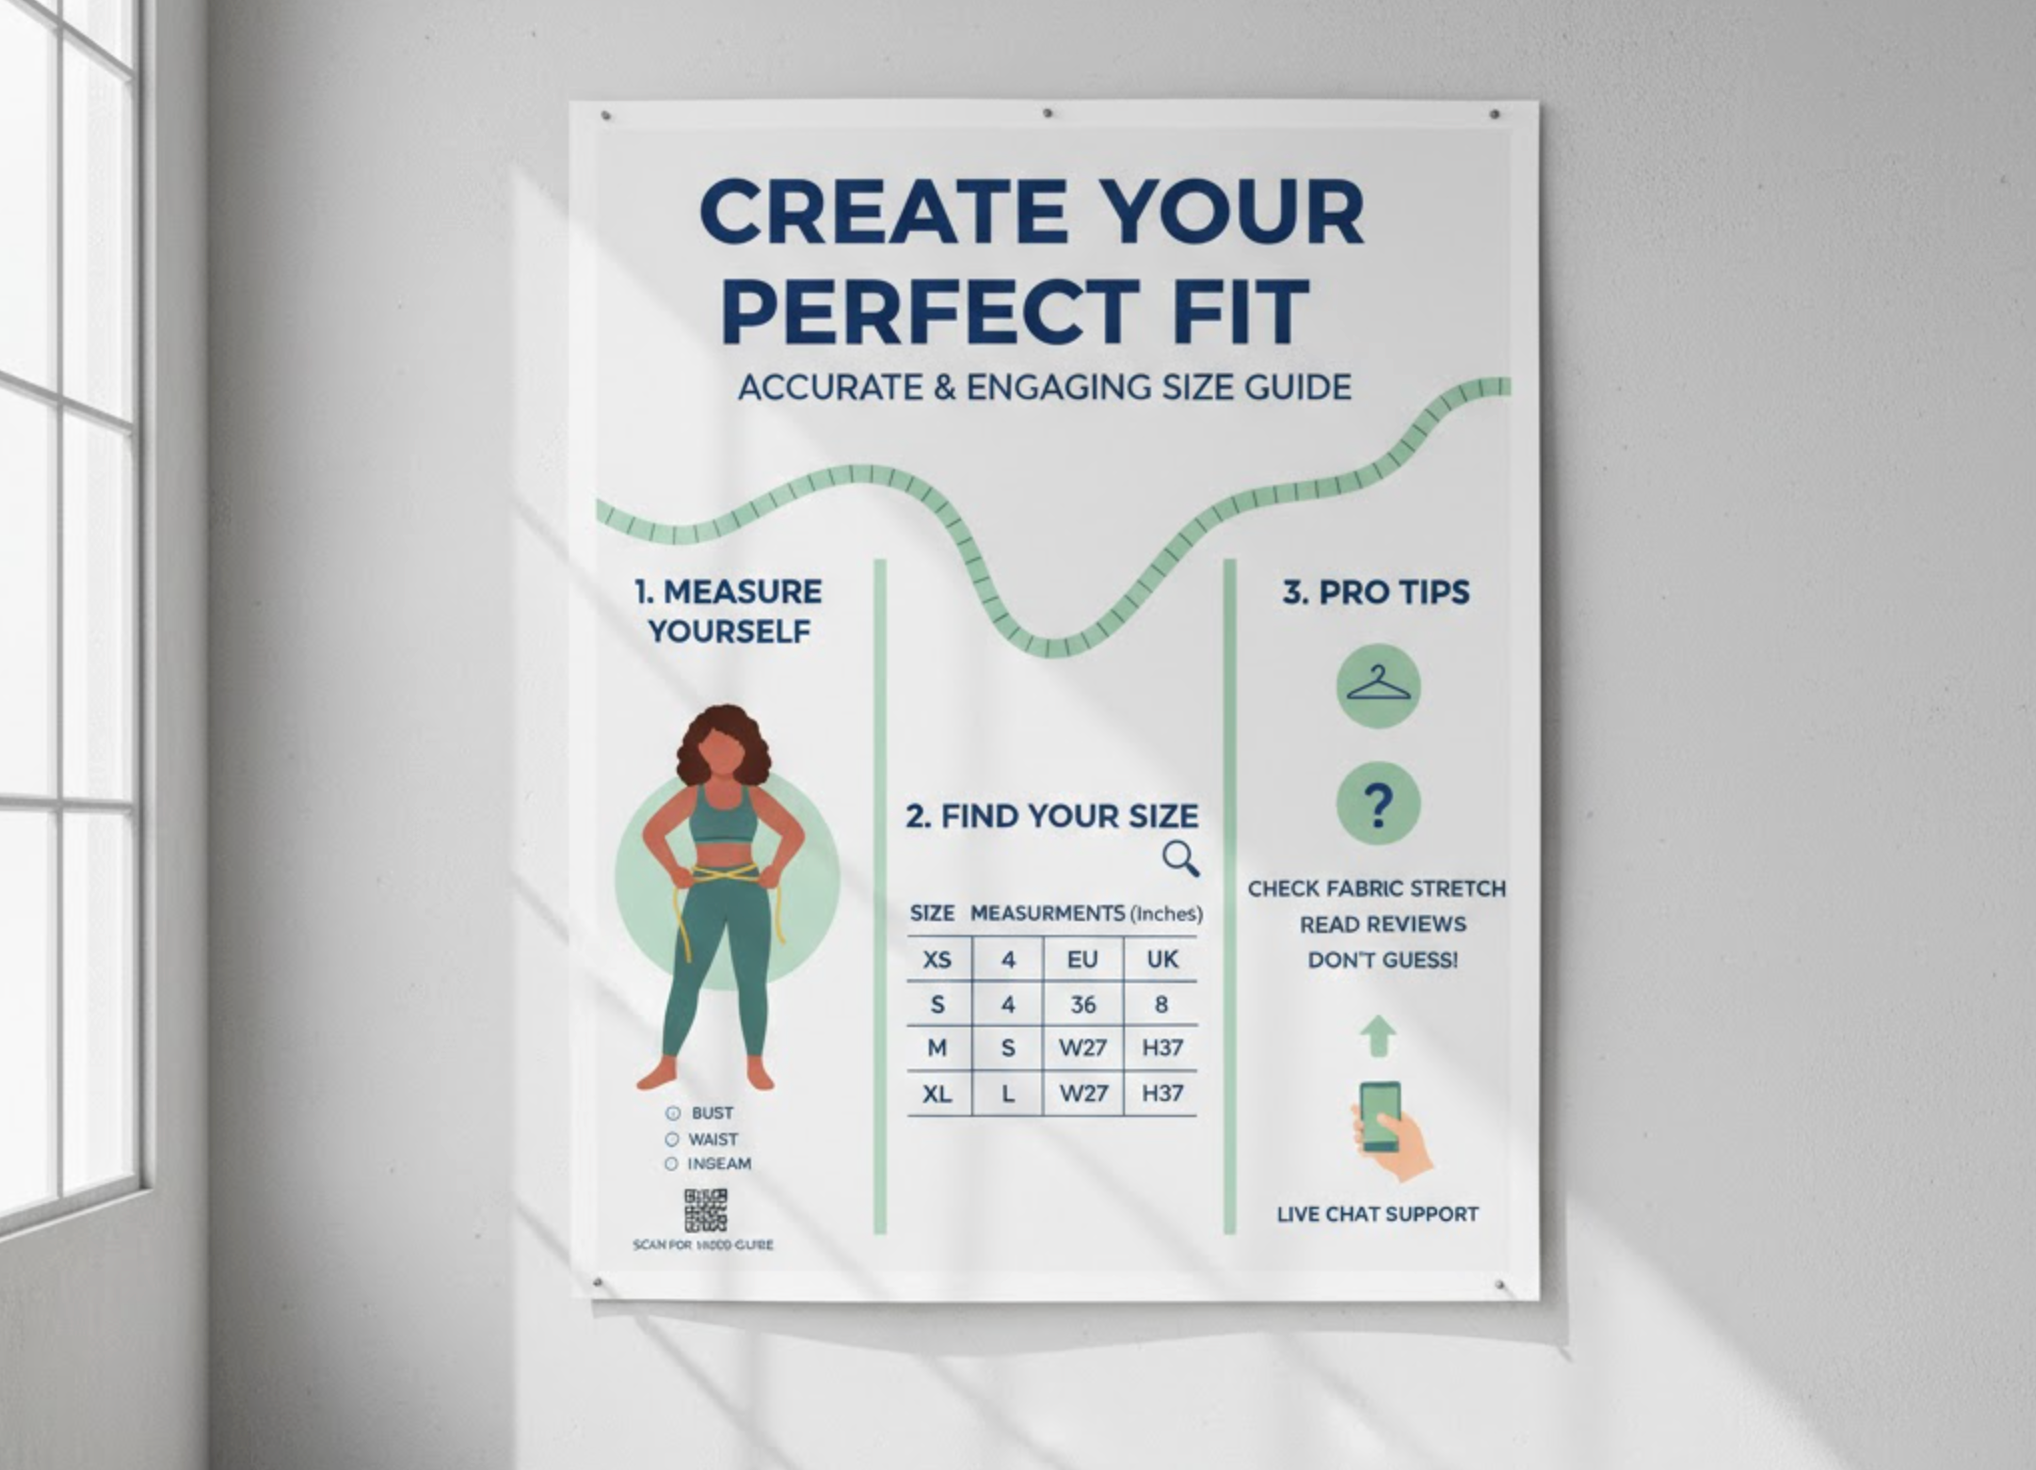
A well-designed size guide can make or break your online store’s shopping experience. When customers cannot try items on before buying, they rely entirely on your product descriptions and measurements to make the right choice. A clear, accurate, and visually engaging size guide helps shoppers find their perfect fit with confidence, reducing returns, building trust, and improving conversions.
Here’s a complete step-by-step guide on how to create one that truly works.
In the world of eCommerce, customers cannot physically touch, feel, or try on your products. That is why a reliable size guide is essential. It gives shoppers the confidence to make informed choices and significantly decreases the chances of disappointment after purchase. When customers know exactly what to expect, they are more likely to buy without hesitation.
A detailed size guide also helps reduce return rates, which saves your business time, shipping costs, and customer service efforts. Moreover, it shows that your brand cares about accuracy and customer satisfaction. In short, a good size guide is not just a helpful tool but an essential element of trust and professionalism in any online store.
Before you start measuring or designing, take time to understand who your customers are and what products they are buying. A unisex hoodie requires a different sizing approach compared to a fitted dress or a tailored suit. Identify your main audience, such as men, women, or kids, and note whether they prefer a slim, relaxed, or oversized fit.
It is also important to determine which product categories need separate guides. For instance, you might need one guide for tops, one for pants, and another for shoes. Keep your measurement units consistent, whether in centimeters or inches, and decide whether to include international size conversions like US, UK, and EU. This planning step ensures your future guide is cohesive and relevant.

Customers often get confused because different brands measure garments in different ways. To avoid misunderstandings, define exactly how you take each measurement. For example:
Including clear, plain-language descriptions like these eliminates confusion and builds consistency across your product line. You can also add small tips, such as “For a relaxed fit, add two to three centimeters,” to help customers adjust based on their style preferences.
The key to a reliable size guide is precision. Use a flexible measuring tape, a mannequin, and a flat surface to ensure consistent results. Always measure each point two or three times and take the average to avoid small errors.
Decide whether you will use body measurements (the customer’s actual body measurements) or garment measurements (the size of the physical product). Body measurements are easier for customers to understand, while garment measurements show how the item fits in real life. If you use garment measurements, make sure to specify that in the guide.
When measuring garments flat, lay the item evenly without stretching it. Measure key areas like the chest, waist, and hem, then double the value to get the full circumference. Following this process ensures your guide is both consistent and trustworthy.
Now it is time to organize your measurements into a chart that is easy to read and compare. Arrange sizes horizontally (XS, S, M, L, XL) and measurement categories vertically (chest, waist, hip, etc.). Present both centimeters and inches, or offer a toggle option so users can switch units easily.
Include fit notes for each size, such as the model’s height and size worn, to help customers visualize proportions. For example:
Model is 175 cm (5’9”) and wears size S.
This kind of real-life detail helps customers relate to the sizing information and make better decisions.
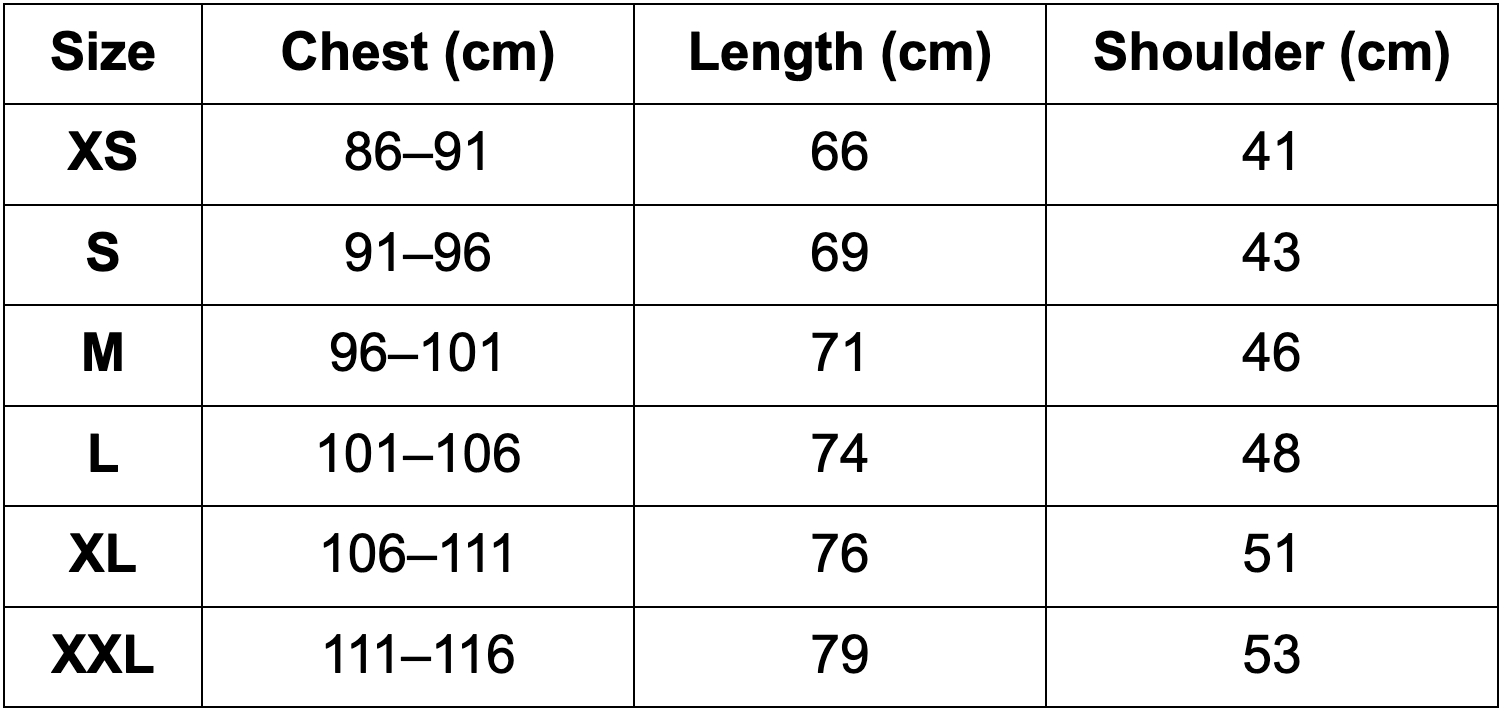
Keep your chart simple, consistent, and visually neat. If you sell several product types, use a uniform design across all charts to maintain brand consistency.
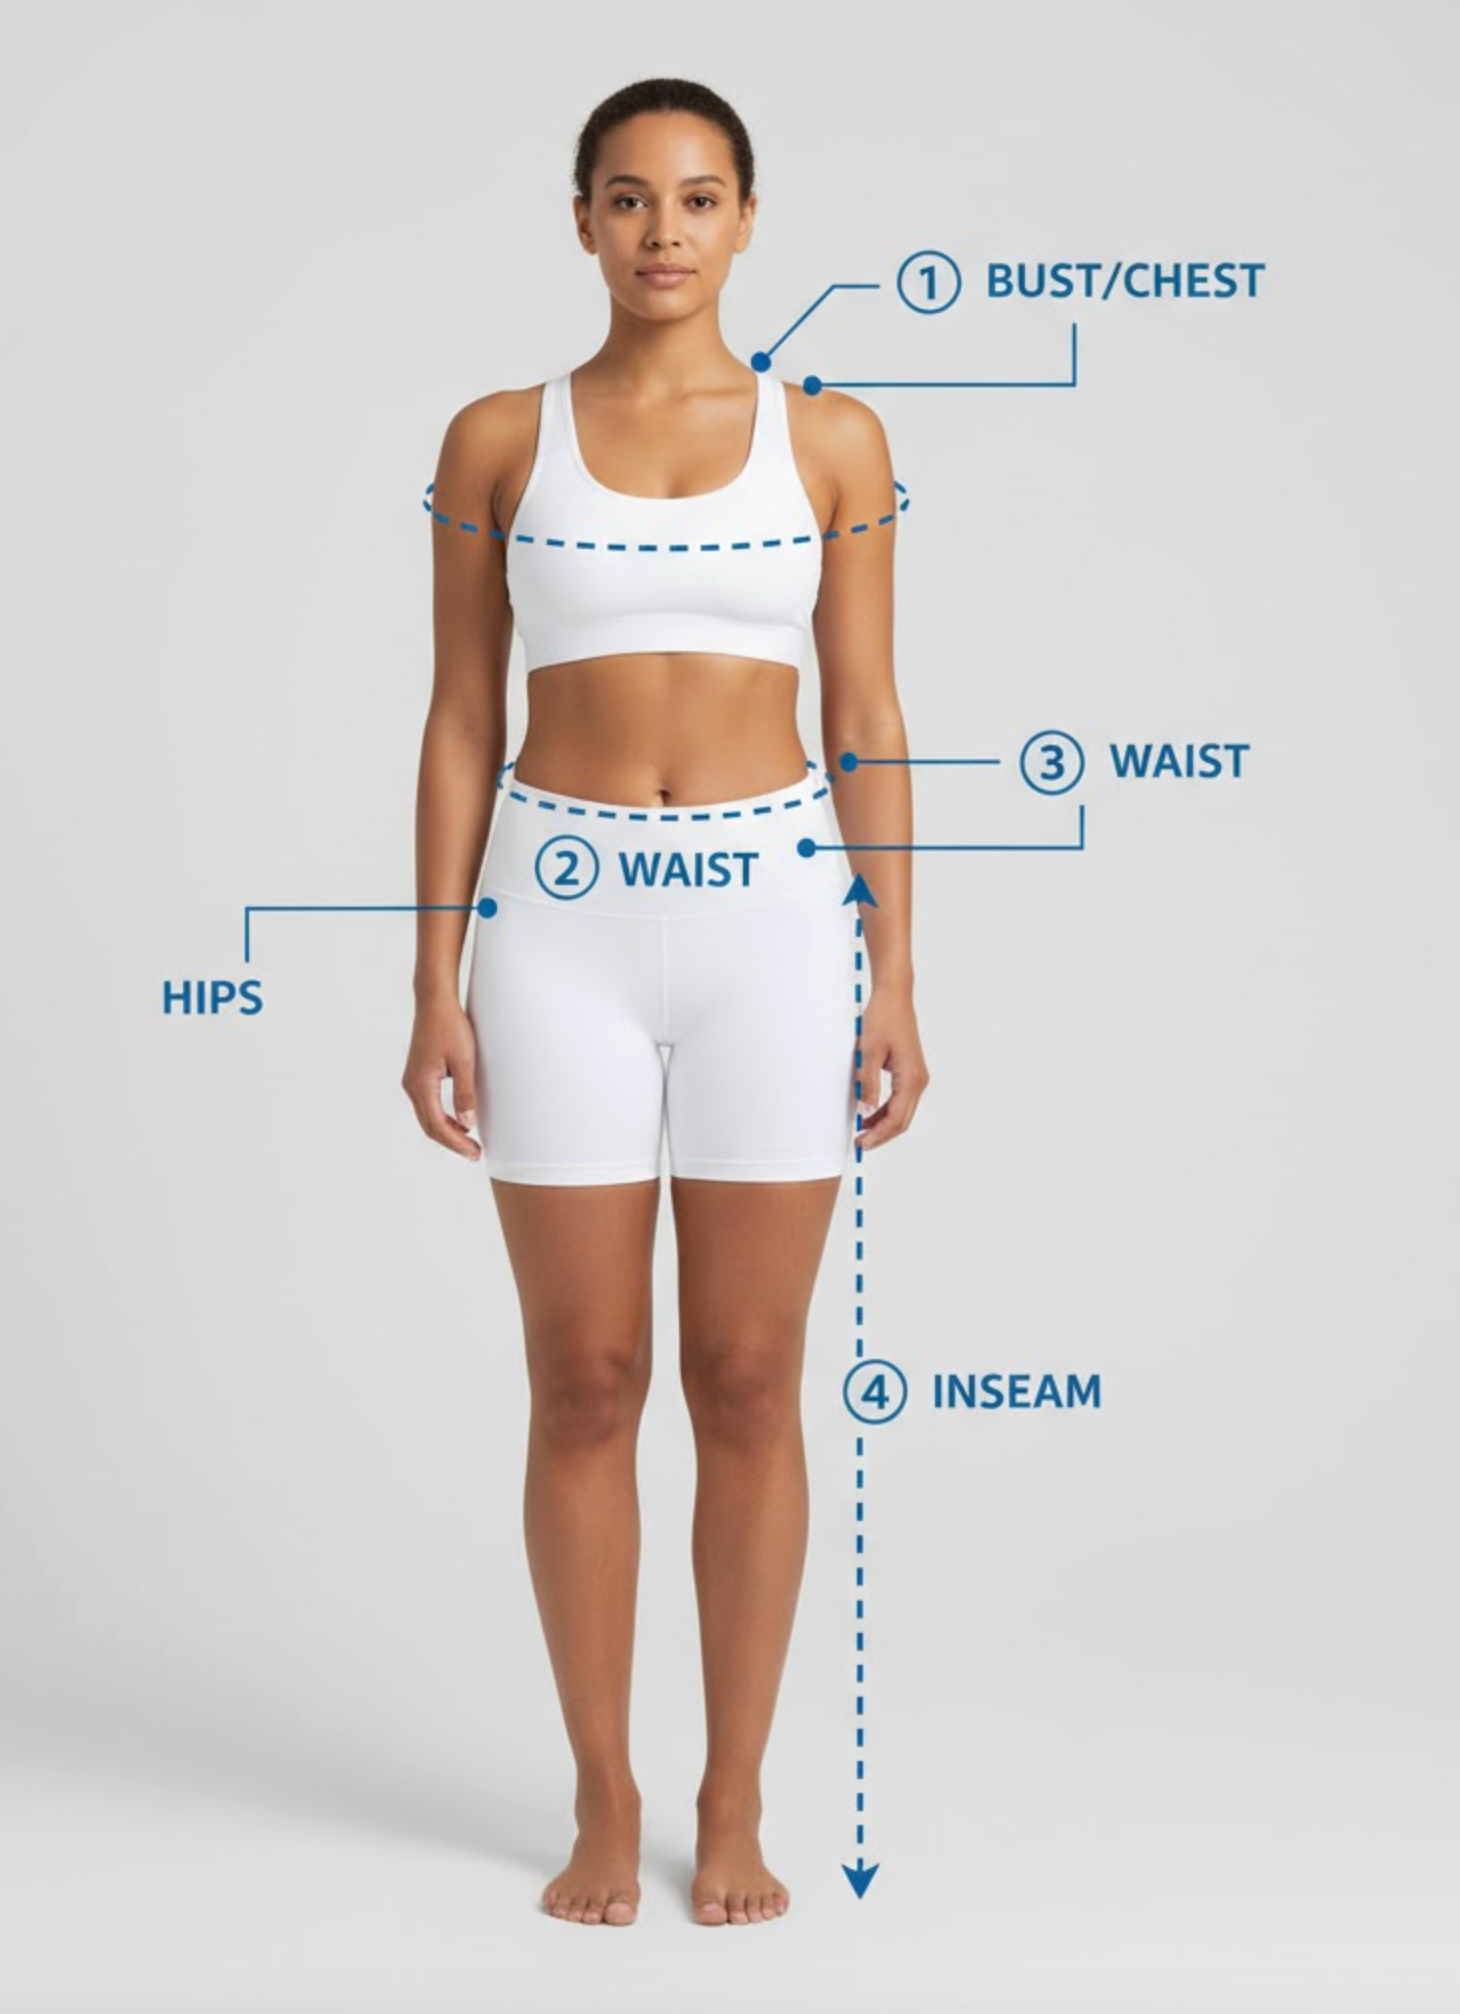
A visual explanation often speaks louder than text. Include line drawings or diagrams that show where each measurement is taken on the body or garment.
For clothing, a simple outline of a shirt or pants with arrows marking the bust, waist, hip, and inseam helps users understand your sizing method immediately. You can also include real photos of models or mannequins demonstrating how to measure correctly.
Additionally, lifestyle photos that show how different fits look, such as slim or relaxed, can help customers visualize the product more accurately. Visuals make your guide not only informative but also engaging and trustworthy.
Measurements alone do not tell the entire story. Fabric type, elasticity, and cut all affect how clothing fits. Include fit notes that describe the item’s feel and shape on the body.
For example:
Explaining fabric behavior helps customers set the right expectations and reduces size-related returns.

If you sell internationally, localizing your size guide is crucial. Clothing sizes vary across regions, so provide a conversion chart that matches major markets such as the US, UK, and EU.
Displaying both centimeters and inches also makes your guide more accessible. Consider adding an automatic conversion feature based on the visitor’s location or a manual toggle that lets customers switch units easily. This small addition enhances user experience and reduces confusion.
Today’s shoppers appreciate interactivity. If your platform allows, consider adding a size recommender quiz or fit finder tool that asks for height, weight, and body type to suggest the most suitable size.
You can also allow users to compare their measurements with the product’s measurements through sliders or visuals. Even a simple popup chart that updates automatically when customers choose a different size can make a big difference.
If you use Shopify, you can use apps, such as Kiwi Size Chart & Recommender or Size Chart & Fit Guide by Avada, to create dynamic and interactive size charts without coding skills.
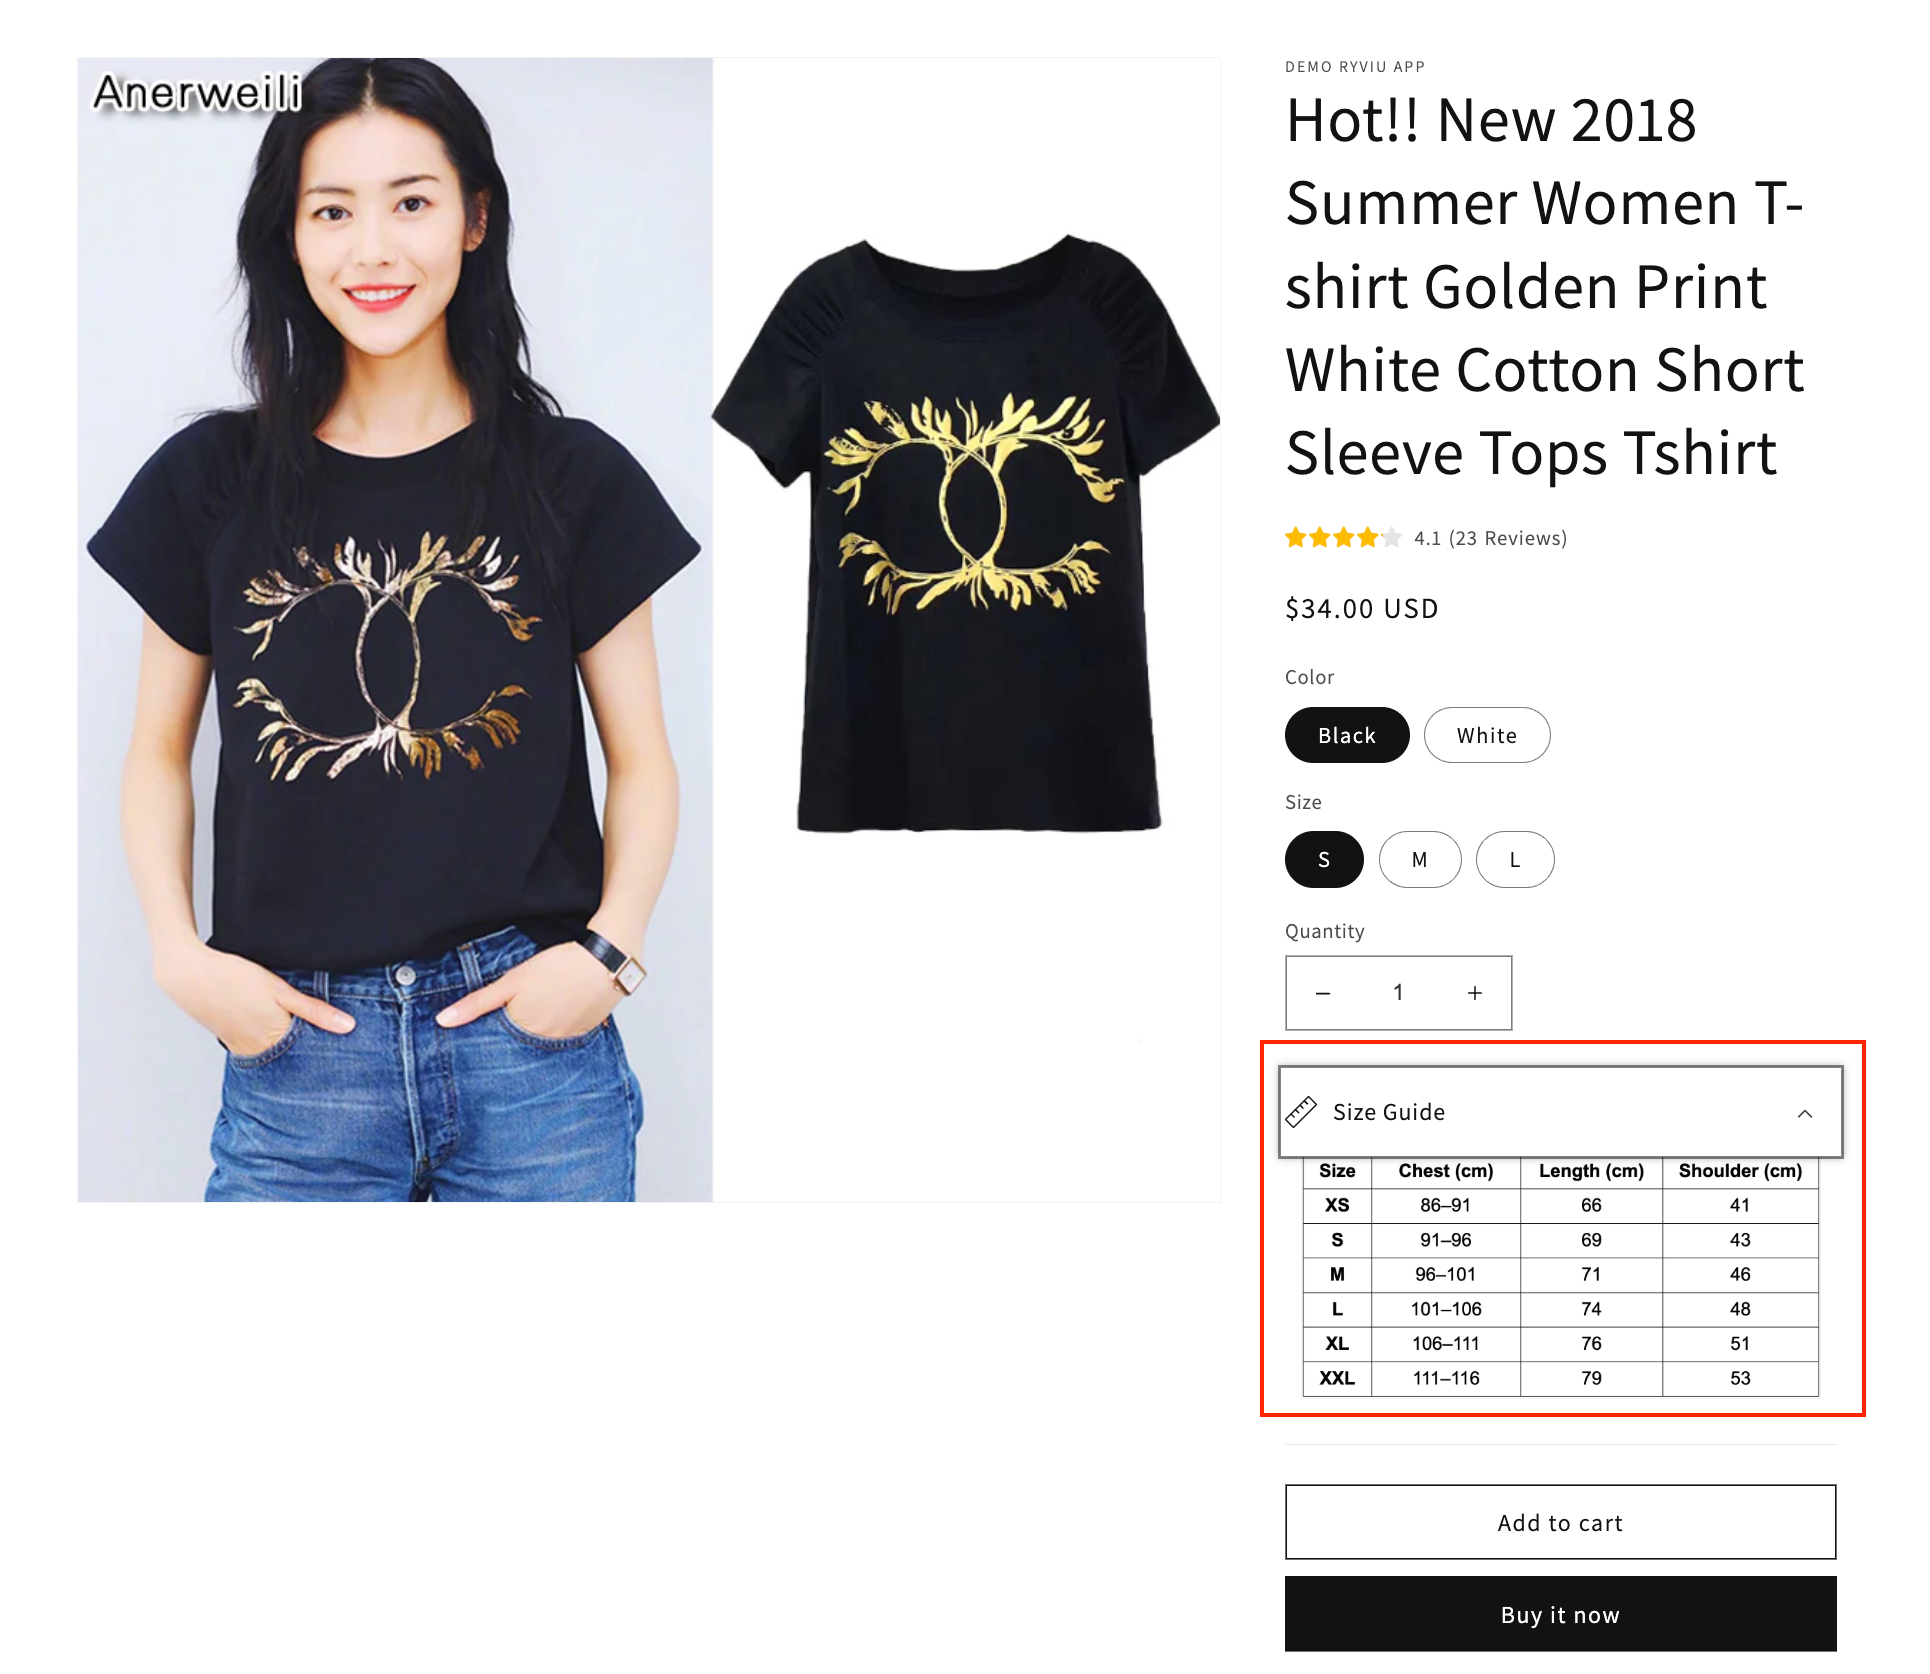
A perfect size guide is useless if shoppers cannot find it. Always place a clear “Size Guide” link near the size selector on your product page. It should open in a popup window so customers can check it quickly without leaving the page.
You can also include a short note beside the size dropdown, like “Runs small, consider choosing one size up,” to provide quick guidance.
On mobile, ensure the guide is scroll-friendly and easy to read. Use collapsible sections or vertical layouts so users do not have to zoom in or scroll horizontally.
Once your size guide is live, monitor its performance. Track customer feedback and return reasons to identify any recurring issues. If many customers mention that items are “too small” or “too large,” revisit your measurements and update them.
You can also test your guide by inviting staff or loyal customers to try on products and confirm if the sizes align with the chart. Review your size data periodically, especially when changing suppliers, fabrics, or garment patterns. Add a note like “Updated November 2025” so customers know the guide is current.
Accessibility is key for every shopper. Use large, readable fonts, high-contrast colors, and clear alt text for diagrams. Keep your language simple and avoid technical fashion terms that may confuse customers.
You can even include a small FAQ section answering common questions such as:
This kind of transparency helps customers feel supported and confident in their choices.
An accurate and engaging size guide is more than a chart of numbers. It is a bridge between your online store and your customers’ real-world expectations. When shoppers can easily understand your measurements, visualize the fit, and trust your recommendations, they are far more likely to complete a purchase.
Start with clear definitions, take precise measurements, and include honest fit notes. Add visuals and interactive features to make your guide more helpful, and remember to update it as your product range evolves. With these steps, your size guide will not only reduce returns but also become a powerful trust-building tool that boosts customer satisfaction and sales.